Categories: Featured Articles » Electrician Secrets
Number of views: 17229
Comments on the article: 0
How to build wires in a socket
Replacing the outlet is simple, but not always everything goes as you want. It often happens that you can’t just take and plug in a new outlet, because the length of the old wires is not enough. They can break off or simply the design of the new outlet is different and it is not possible to clamp the wires normally. In this article, we will look at ways to lengthen short wires.
Cores of wires
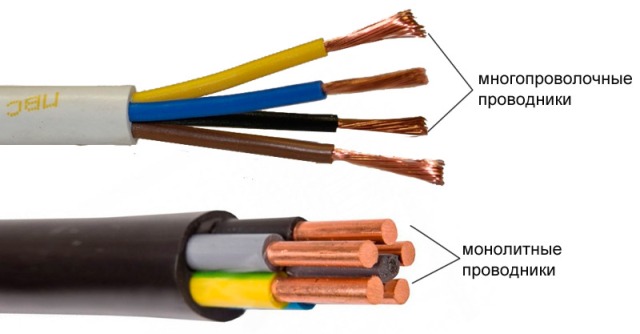
Wires and cables can have single-wire cores - these are cores that consist of a single solid wire, they are called rigid or monolithic cores. Frequent bending may break. Another type - multi-wire veins - they are soft, consist of several thin wires. It is often called stranded or flexible to bend such wires. The number of wires depends on the flexibility class of the core - the higher it is, the more wires.
How does this relate to the extension of wires in the outlet? The fact is that the method of connecting them depends on the type of cores. Stranded wires are not connected using screw terminal blocks or bolts, since they are not designed for this because of the compression of the wires it will not work provide good contact. What we will do next.
Terminal blocks and sleeves
In order to lengthen the wire in the socket, you just need to connect the "stub" of the old wire that sticks out of the wall or the socket with a new longer one. Otherwise, you need to lay a new wire from the junction box of the length you need - but this, you see, is costly and stupid in most cases.
There are two main types of terminal blocks:
1. Clamping. These include modern VAGO terminal blocks. They consist of a spring-loaded contact and an insulated casing. In principle, terminal blocks are suitable for use with multi-wire conductors.
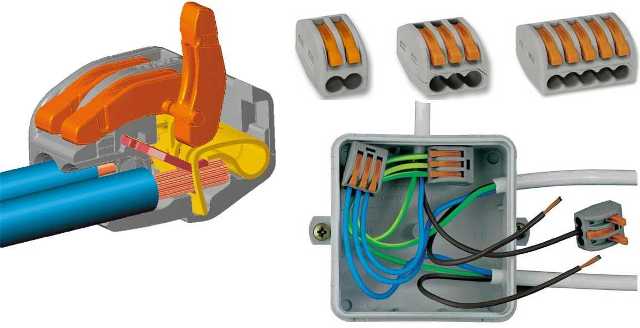
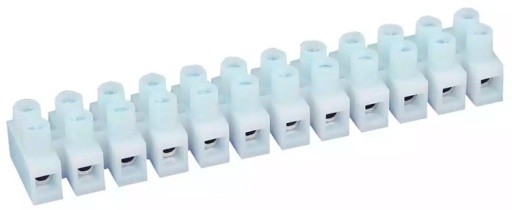
2. Screw - consist of an insulated housing and a contact that is clamped by a screw. Depending on the design of the terminal block, there can be either a metal tube, like a sleeve with screws, into which the ends of the wires are inserted, or screw terminals located on an insulated base, for example, carbolite.
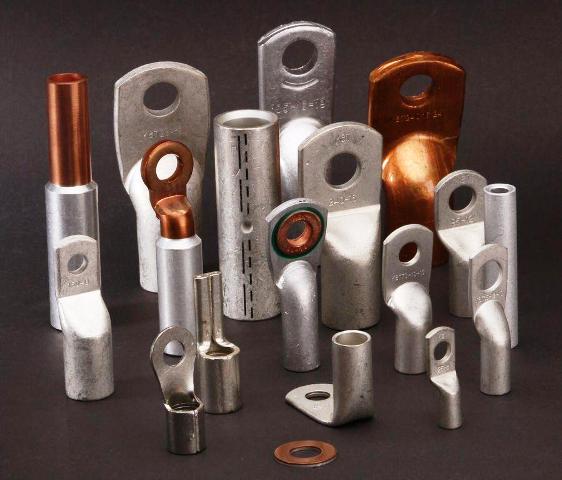
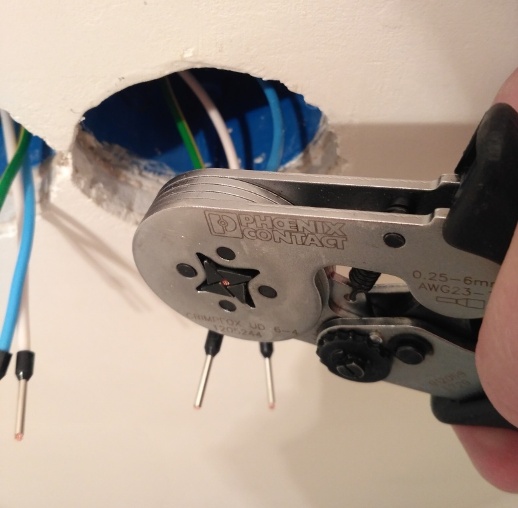
3. Sleeves and cable lugs - This is an electrical product designed to connect cables by crimping. Crimping is done with a special press or pliers (depending on the diameter of the sleeve). Some electricians advise crimping sleeves or tips with pliers. You can’t do this!
Rather, it’s possible, but only for temporary use or in places that do not carry an important load, for example, for low-voltage low-voltage equipment, such as power supplies for experiments and other training facilities. That is, in those places when you know what you are going on.
Conclusion:
Sleeves and tips used for permanent use must be crimped with a special tool.
The logical question is “Why can’t you squeeze sleeves with pliers?” Look at the sleeve - it is round, the wire is also round, the connection of the two wires is oval or round (if they are twisted). What does it mean? Everything is very simple - when you squeeze the sleeve with pliers, it tends to become flat - then voids form in the sleeves, and even if the wire now seems to be clamped well, then after a while it can go into voids. The contact loosens and the wire pops out of the sleeve.
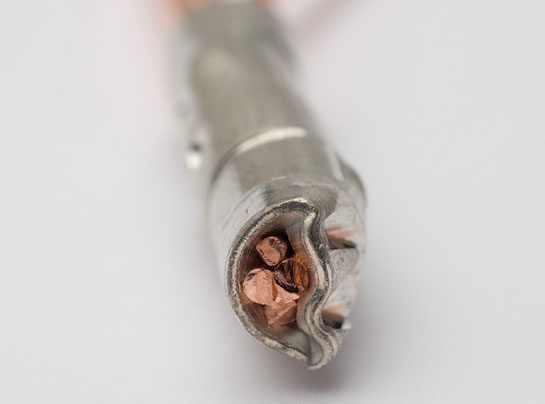
Where it leads? Bad contact heats up, insulation begins to deteriorate upon heating, the conductors are exposed - sooner or later a fire or short circuit will occur.
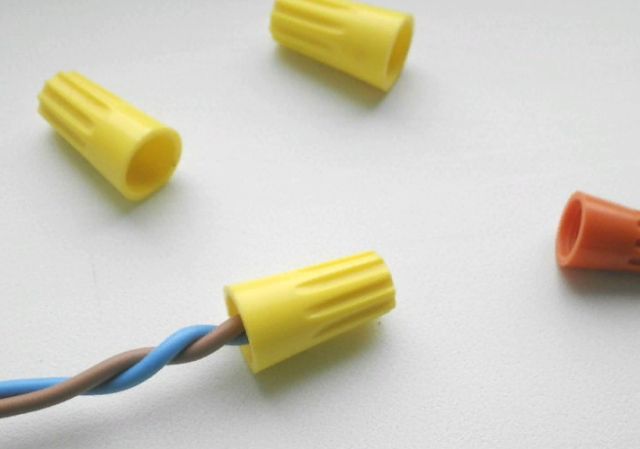
Here it is necessary to mention caps type PPE. They consist of an insulated cap inside which a spring is located, it is needed to compress and hold the twist.
How to crimp sleeves
The tool for crimping the sleeves is either a pliers or various kinds of presses. Including mandrels for crimping sleeves with a hammer. In such devices, the core is placed in a U-shaped opening, after which it is clamped with a screw or pliers.
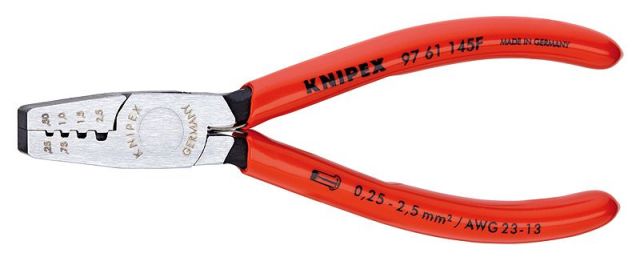
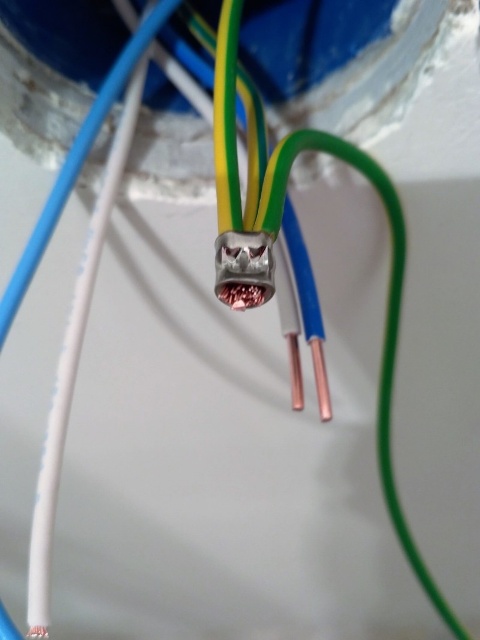
Or they beat with a sledgehammer, as a result of which the crimped sleeve has a shape between round and square, which provides a good contact area for current flow and holding the core.
The shape of the matrices can be different, some of its varieties you see in the figure below. Depending on their shape, corresponding grooves or traces of various shapes appear on the sleeve or tips.
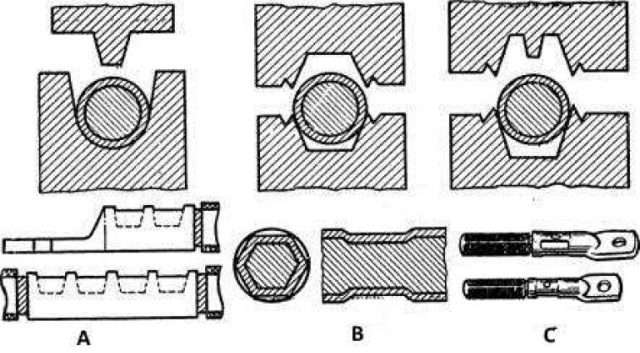
Each type of tip needs its own matrix profiles.
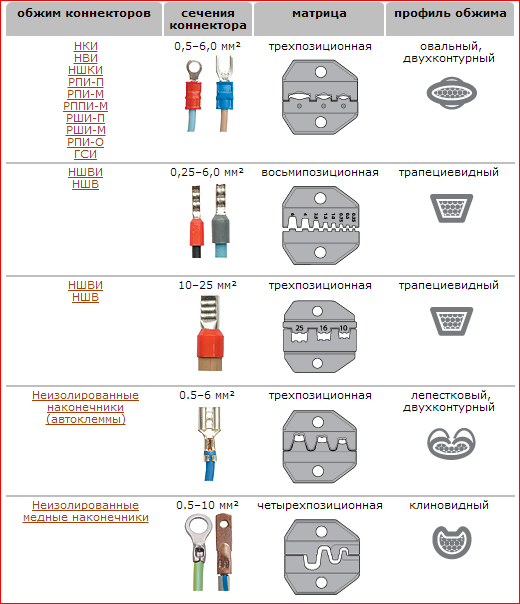
Better consider opresovschiki who squeeze the sleeve from different sides, like the action of the diaphragm of the camera. They mainly distinguish between hexagonal (hexagonal) crimping (excellent) and square four-sided (worse).
Video: a review of a tool for crimping lugs of the NShVI type with a four-segment matrix for square crimping - an excellent solution for connecting soft wire with a multi-wire core to automatic machines, sockets, or for simple extension of wires in switch boxes and socket boxes.
But because of their design, it is not always convenient to crimp a straight through connection. But with the sleeves and lugs at the end of the cable do an excellent job.
Soldering and copper
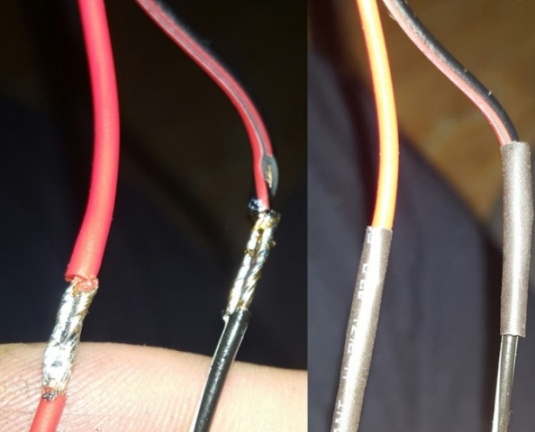
The solder connection is suitable if you need to extend the copper wire. However, this method has a drawback: if you do not have the ability to de-energize the outlet group separately, you need a gas or battery soldering iron. If this is not the case, you need to ask your neighbors. You can still heat the sting with a burner or on the burner of a gas stove and solder the wires until it cools down.
Soldering is permitted by current regulations and is well suited for extending and connecting wires. Unlike welding, there is no spray during soldering and you will not damage the wallpaper or other type of wall covering.
Soldering of copper can be carried out solder and rosin, the most universal solder is POS-61, by the way it is often sold in the form of a tube with rosin - which speeds up soldering and tinning. In addition to rosin, fluxes of the LTI-120 brand and others can also be used. Do not use acids and other active fluxes for tinning of electrical wiring in order to avoid contact dislocation in the compounds under the influence of active substances.
Short wire connection
The main methods for connecting wires were listed above, but which one is better for lengthening the ends of the wires in the outlet.
Consider the conditions:
-
Limited place - the short ends are in the socket, where there is already little space. Therefore, it is convenient to crawl into it with at least pliers, it does not always work.
-
If copper wires need to act with a minimum of bends to avoid a break in the cores.
-
It is impossible to overheat the wires, because insulation damage is unacceptable at the already short ends - it will be difficult to repair, and in especially advanced cases it is impossible without removing the coating on the walls.
Consider the methods of connecting wires in these conditions:
1. Soldering. If a copper wire is laid in the wall, you can solder to its end. Do not solder live wires! Problems arise if you cannot turn off the room separately. One of the possible options is to power a separate outlet from the “upper” terminals of the input machine, which are located on the input side and are always energized. Or heat the soldering iron from the network, then disconnect the input and quickly solder one core, then the second in the same way.
2. Screw terminal blocks
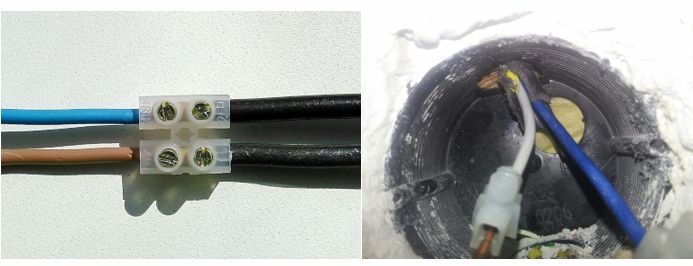
If there is not enough space, then you can remove the plastic sheath from the terminal block, and insulate it after installation. Can be used with both copper and aluminum wires.
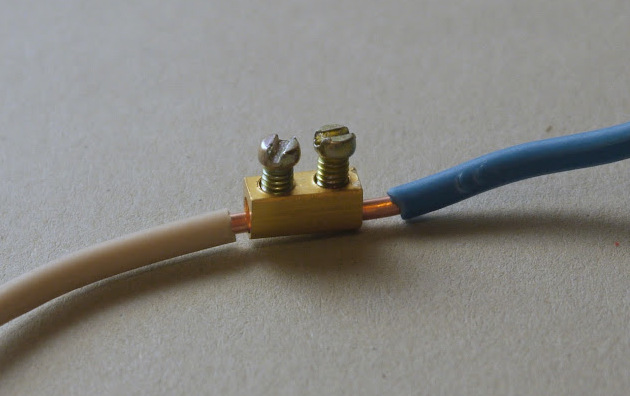
Important:
IN THIS CASE, THE VEIN SHOULD BE MONOLITHIC OR MULTI-WIRE, BUT COMPRESSED BY THE NSSHVI TIP
3. Clamping terminals, for example WAGO
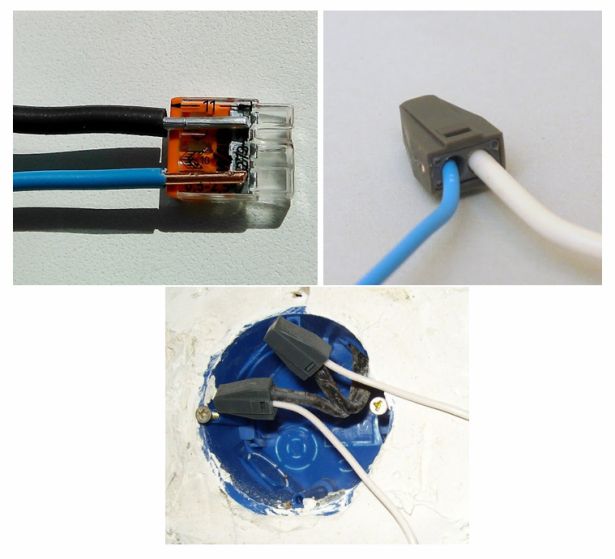
These are the main methods of connecting wires that are allowed by the PUE and are safe for constant use. The main thing - avoid direct contact of aluminum and copper and do not twist in any form and manifestation.
By the way, this video shows not quite a standard, but quite a good and interesting method of building up wires, using the example of a switch and screw terminal blocks. It is suitable if the ends of the wires are very short, and there is very little space around.
Conclusion
We examined the main ways of building wires in sockets and switches and other places with cramped conditions. I hope this article was useful to you. Share your ideas and experiences in the comments.
See also at bgv.electricianexp.com
:

