Categories: Sharing experience, Repair of household appliances
Number of views: 118144
Comments on the article: 6
Phone Charger Repair
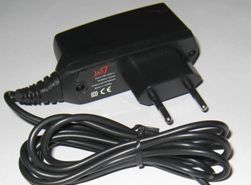 Very often there is a problem of failure charger a mobile phone or other device that uses a charger to charge the battery. The main reasons why the charger may fail are as follows:
- wire break;
- failure of the charger unit;
- violation of the contact connection of the wire with the plug or charger unit.
Very often, the cause of the failure of the charger is a wire break or violation of the contact of the wire with the structural elements of the charger - plug and block. In this case, you can repair the charger yourself. Consider the principle of repairing damage to the charger wire using a specific example of repairing the charger of a Nokia mobile phone (with a thin plug).
To repair the charger, we need:
- multimeter;
- knife;
- a soldering iron and everything necessary for soldering;
- insulating tape and heat-shrink tubing (if available);
- a small piece of thin wire to ensure contact with the inner contact part of the charger plug (for the thin plug of the Nokia charger)
The first step is to look for damage to the wire or contact connection. Damage to the wire can be detected visually. The place where the conductive wire was torn is usually of a different color and slightly smaller in diameter.
If a visual inspection could not determine the place of damage to the wire, then most likely the charger does not work due to the wire being torn off at the point of its attachment to the unit or plug. The wire may also be damaged, we will find out during the further search for damage.
We take the wire and cut it 7-10 centimeters further than the plug. If there is no contact disturbance at the point of connection to the plug, we will connect the wire at the point of cut. Therefore, it is impossible to cut the wire at the point of attachment to the plug, that is, it is necessary to leave a small piece for the possibility of connecting the wires by soldering.
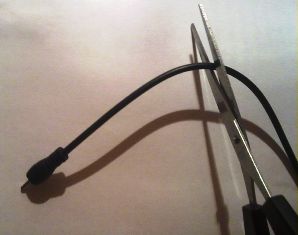
Cut the cord
Strip the wires on the part of the wire that goes to the charger. Take multimeter and select a DC voltage limit of 20 volts. Connect the charger to the mains and measure the voltage at the output of the charger, i.e. at the stripped ends cord.
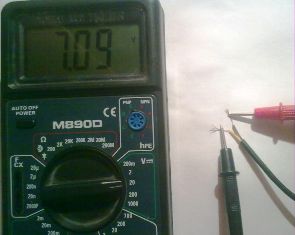
We measure the voltage at the output of the charger
If the device shows the voltage value, then this indicates that the charger unit and the wire are not damaged. In this case, the device showed 7 volts - this is the nominal output voltage of this charger. At this stage, we can conclude that the charger does not work due to a violation of the contact of the conductors at the point of their connection to the plug. You can verify this by phoning the plug.
For this we clean the wiresthat go from the plug, insert a thin wire into the inside of the plug (this is necessary to contact the internal contact part of the plug).
We take a multimeter and select the dialing mode. With one probe, touch one of the stripped conductors, and with the other, first to the external contact part of the plug, and then to the inserted wire. If the device showed a contact (the presence of an audio signal), then this indicates that the contact between this wire and the plug is not broken.
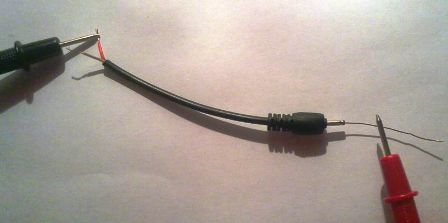
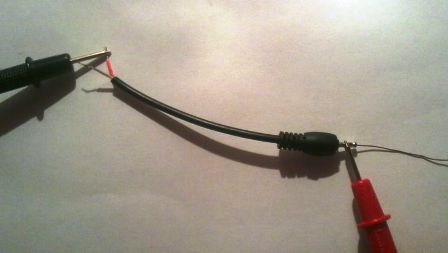
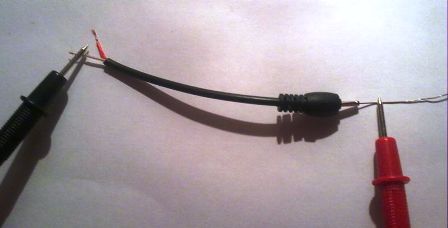
Dongle plug
We rearrange the probe of the device to another stripped conductor, with the other one by one we touch the external part of the plug, and then to the wire. If the device did not emit a signal when touching both contact parts of the plug, then there is no contact. That is, one of the wires is torn from the plug.
In this case, there are two ways: you can purchase a new plug, or you can repair the old one. The first way is simpler and more reliable. A new plug can be purchased at mobile phone repair shops or on the radio market. Perhaps you have an old charger in which the plug is not damaged.
In this case, it is enough to solder the new plug to the charger, while observing the polarity. How to check the correct connection of wires (polarity)? As a rule, on each cord there is wire color marking. If it does not match, then you need to make sure that the wires are connected correctly.
To do this, plug the charger into a power outlet and the new plug into a mobile phone. Attach the plug conductors to the charger cord. If the charge has gone, then you connected the conductors correctly. If the phone does not charge, swap the conductors. The check must be carried out in any case, even if the color coding of the connecting cords is the same, since the marking of the cords may not match.
The next step is to connect the two cords soldering. If you have a heat shrink tube, then before brazing, put part of it on one of the brazed cords. Solder the conductors, observing the polarity. Insulate both wires with insulating tape, put on the heat shrink tubing. Check if the charger is working.
If you do not have the opportunity to purchase a new plug, but you still want to recharge the charger, then the second way to repair the damage is to repair the plug.
Remove the rubber (plastic) coating with a knife from the plug. In this case, be careful, do not rush, as you can damage the plug itself.
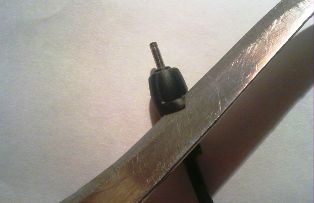
Remove the rubber coating from the plug
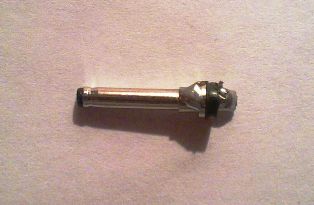
Peeled plug
The next step is soldering the charger cord to the plug.
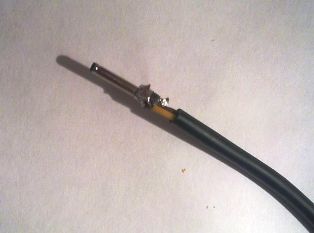
Soldered cord to plug
Check the performance of the charger. If everything is normal, isolate the conductors, and put a heat-shrink tube on the plug. The charger is ready for use.
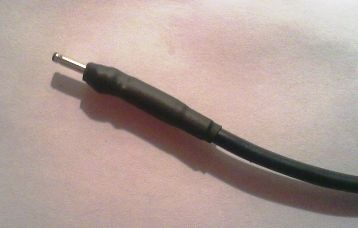
Heat shrink tube on plug
We examined the case of contact failure at the point of attachment of the cord to the plug. Another reason is also possible. Consider another case.
You cut the wire, checked the voltage at the output of the charger, it is missing. We cut the wire near the charger, departing from the charger unit 7-10 cm. We clean the wire that comes out of the charger unit and check for voltage at the output. The presence of voltage at the output indicates that the charger is working properly. We call the plug according to the above method. In this case, there is no contact violation.
The chime of the charger cord indicated that one of the conductors was broken. Visually not visible damage. The best option is to purchase a new wire. Then solder it to the plug and charger unit, observing the polarity.
In order not to make a mistake (especially if the wires have the same color marking), connect them and plug the charger plug into the phone before soldering the wires. If charging starts, connect the conductors by soldering. Insulate the wires at the soldering point and put on the heat shrink tube (you must wear it on the wire before soldering). Damage repaired.
If the wire is intact, the contact connection of the plug is not broken, the charger unit is damaged or one of the wires inside the unit is torn off.
Unscrew the charger unit and look at the conductor connections. If all wires are connected normally, then the memory unit itself is damaged.
If you have a damaged charger unit, then without the skills in the field of electrical engineering, you will not be able to find the reason for its failure, and even more so to fix it yourself. Repairing a charger in a specialized service will cost you more than a new charger.
See also at bgv.electricianexp.com
:
